Distributed Feature Store Ingestion with Iguazio, Snowflake, and Spark
Nick Schenone , Xingsheng Qian and Brennan Smith | December 21, 2022
Enterprises who are actively increasing their AI maturity in a bid to achieve business transformations often find that with increased maturity comes increased complexity. For use cases that require very large datasets, the tech stacks required to meet business needs quickly become unwieldy. AI services that involved predictive maintenance, fraud detection, and NLP serve critical business functions, but under the hood, the data wrangling required is a major bottleneck for the teams tasked with delivering business value.
Distributed ingestion is one piece of the data complexity puzzle. With distributed ingestion tools like Spark, data science teams can increase scalability to process large amounts of data quickly and efficiently, improve performance by speeding up the overall time it takes to ingest and process the data, and leverage a simple API to abstract away much of the complexity of using multiple machines.
But distributed ingestion tool is just one component of an end–to–end ML pipeline, so it needs to work together with all the other parts. A tech stack for a particularly complex use case could include components like a feature store, a data lake and much more. Adding a tool to the stack is never simple--integrating and maintaining multiple services can become an overwhelming task for engineering teams.
For enterprises who are deploying AI at scale, a feature store has become a critical component. The Iguazio feature store is integrated with popular tools such as Spark, Dask, Snowflake, BigQuery, and more. In addition to integration with external tools, Iguazio’s feature store provides a simple interface to perform complex data ingestions and transformations at scale using its Python SDK.
In this blog, we’ll share a step-by-step guide on how to leverage distributed ingestion into the Iguazio feature store using Snowflake as a data source and Spark as an ingestion engine.
We will start by setting up the tooling and then show an example of ingesting into Iguazio’s feature store:
Select Your Spark Flavor
First, we will need a Spark cluster. The Iguazio platform provides two different options:
- A standalone persistent cluster that you can associate with multiple jobs, Jupyter notebooks, etc. This is a good choice for long-running computations with a static pool of resources. An overview of the Spark service in Iguazio can be found here along with some ingestion examples.
- The Spark Operator for Kubernetes. This is a temporary cluster that only exists for the duration of the job. This is a good choice for shorter one-off jobs with a static or variable pool of resources. Some examples of using the Spark operator on Iguazio can be found here as well as below.
One of the benefits of the standalone cluster is that you can associate it with a running Jupyter instance on the Iguazio platform for glue-less integration and PySpark out of the box. For this reason, we will use the standalone cluster in this guide.
Create Spark Cluster
Creating a standalone Spark cluster in the Iguazio platform is straightforward – the only requirement is that your user needs the Service Admin role to be able to create new services (see Management Policies in the Iguazio docs for more information).
Once your user has the requisite roles, navigate to the Services tab on the left-hand side:

Then, select New Service in the top right-hand corner:

From there, you can create a new Spark service with your desired name, user permissions, replicas, Memory/CPU resources, node selection, and more:
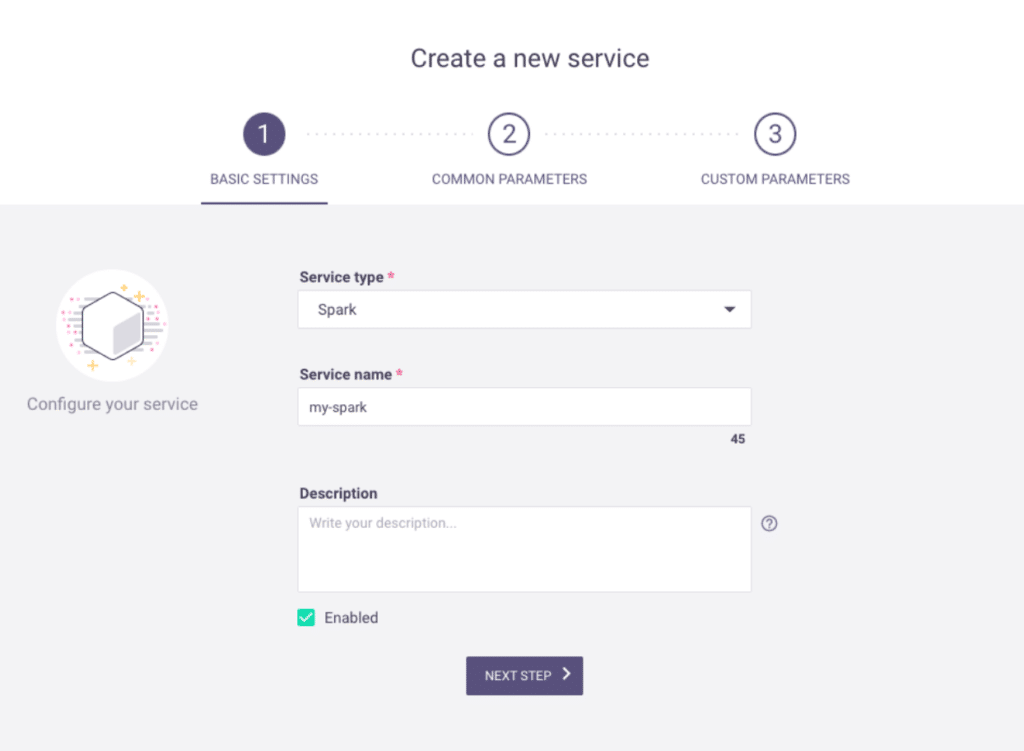
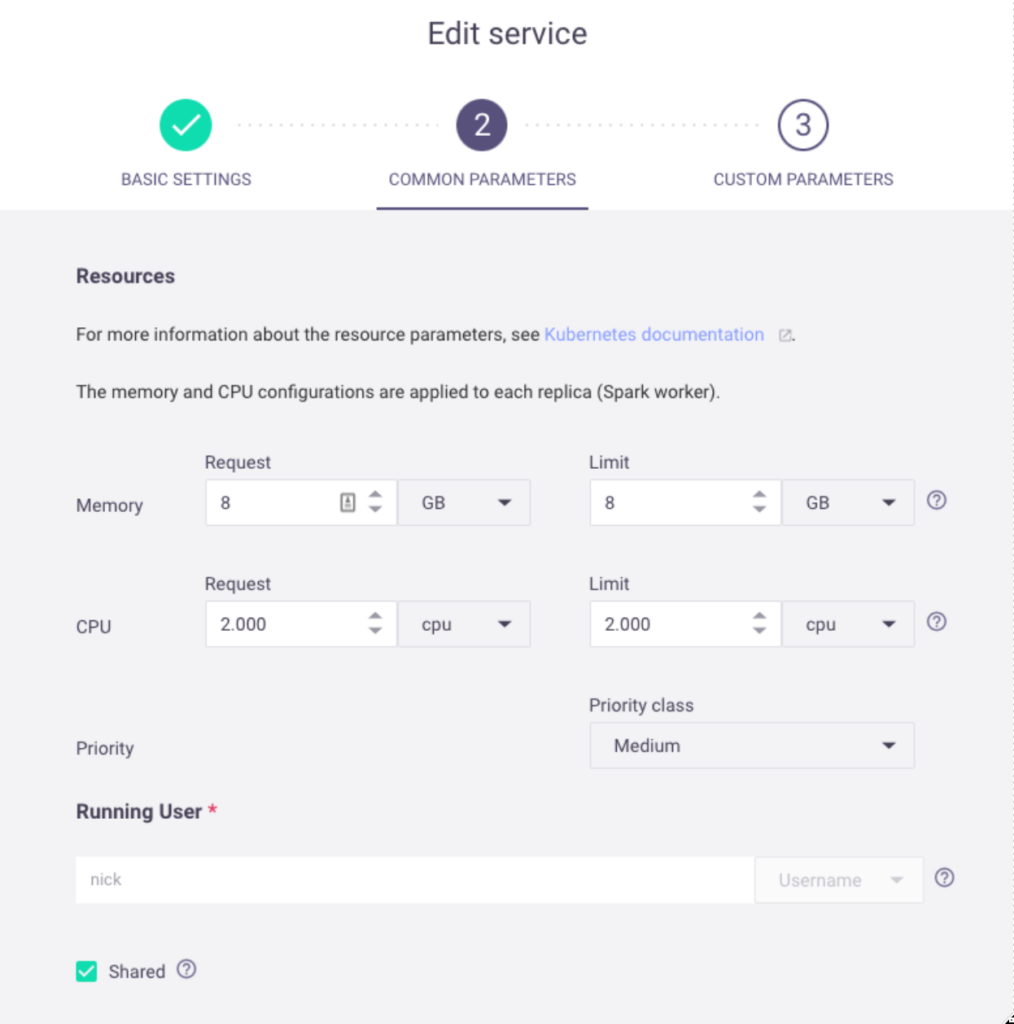
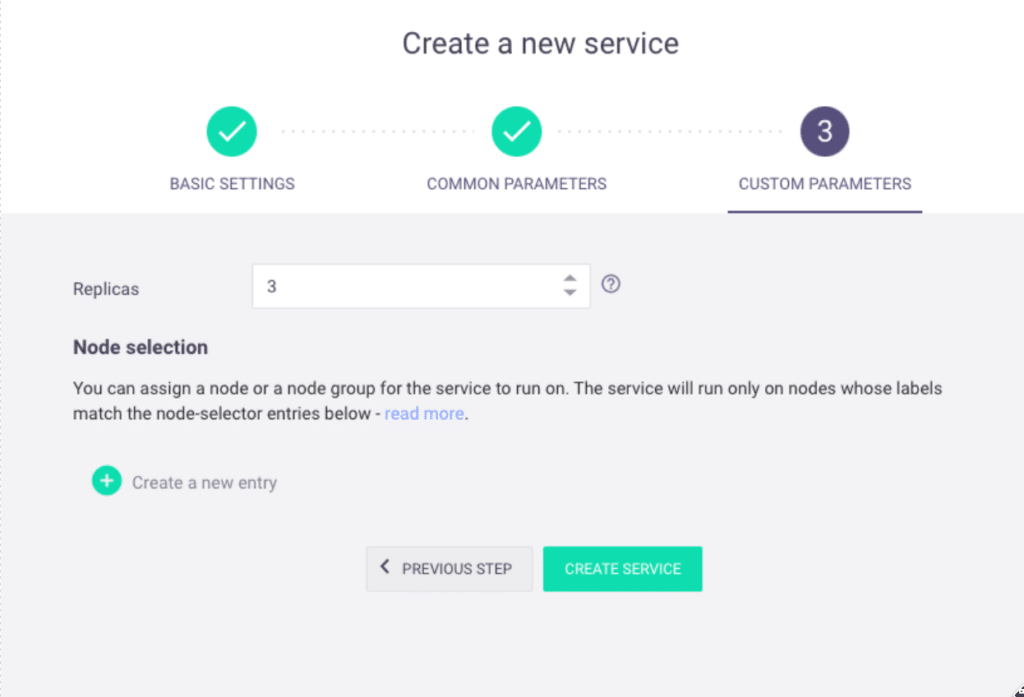
Once successfully created, you can view the new Spark service on the Services page:

You can also select the service to view the Spark dashboard:

For more information on using and customizing the Spark service in Iguazio, see the documentation.
Associate Spark Cluster with Jupyter Service
One of the convenient features of working with Spark and Jupyter in Iguazio is the ability to seamlessly associate a Spark cluster with one or more Jupyter services. This allows the user to start using PySpark out of the box.
To do this, edit your Jupyter service and select your desired Spark cluster on page 3:

After applying your changes, you can create a Spark Session in Jupyter with the following snippet:
from pyspark.sql import SparkSession

spark = SparkSession \

    .builder \

    .appName("snowy") \

    .config("spark.executor.memory","4G") \

    .config("spark.executor.cores",2) \

    .config('spark.cores.max', 6) \

    .getOrCreate()
Then, view the running application in the Spark UI:

We will use this same Spark context to perform distributed ingestion from our Snowflake data source.
Create Snowflake Source
Although the Iguazio feature store can work with just about any data source, there are several first-party data connectors that make it very simple to ingest from various sources. Such data connectors include BigQuery, CSV, Kafka, Parquet, and Snowflake.
This allows you to define a connection to these places using high-level Python syntax. To perform a query to a given Snowflake warehouse and database, use the following snippet:
sfSource=SnowflakeSource(

    name="snowflake_applications_set",

    url = os.getenv("SF_URL"),

    user = os.getenv("SF_USER"),

    database = os.getenv("SF_DATABASE"),

    schema = os.getenv("SF_SCHEMA"),

    warehouse = os.getenv("SF_WAREHOUSE"),

    query = "SELECT * FROM MLRUN_DEMO.CREDITCARD.APPLICATIONS"

)
In this guide, we will be using a credit card application dataset from a Kaggle competition. The dataset can be found here: Kaggle: Credit Card Approval Prediction, however, you can easily substitute your own warehouse, database, query, etc.
Feature Store Refresher
We have written at length on the Iguazio blog about ML pipelines and real-time feature engineering using the Iguazio feature store, so this guide will not go into detail on the inner workings of the feature store itself. Rather, we will only cover what is necessary to perform our distributed ingestion from Snowflake via Spark.
The Iguazio feature store has two main concepts:
Feature set: A group of features that can be ingested together and stored in a logical group (usually one-to-one with a dataset, stream, table, etc.)Feature vector: A group of features from different feature sets
They relate as shown in the following diagram:

In our case, we are interested in ingesting a Snowflake table as a feature set. Then, we can join this table with other data sources (e.g., other Snowflake tables, Kafka streams, CSV, Parquet, etc.) to create a feature vector for training and serving purposes.
Ingest Snowflake Table via Spark
Once our Spark session and Snowflake source are created, the ingestion itself is quite simple. First, we define our feature set as described in the previous section:
applications_set = fstore.FeatureSet(

    name="applications",

    entities=[fstore.Entity("ID")],

    description="applications feature set",

    engine="spark"

)
This feature set, credit card applications, will be joined with other feature sets in the future to construct a full feature vector. Then, we can perform ingestion from Snowflake via Spark using the following:
fstore.ingest(

    featureset=applications_set,

    spark_context=spark,

    source=sfSource

)
This will return the newly created Feature Set as a Spark dataframe for immediate usage. However, most of the time a user will retrieve the data directly from the feature store.
You can also view the data in the feature store UI like so:
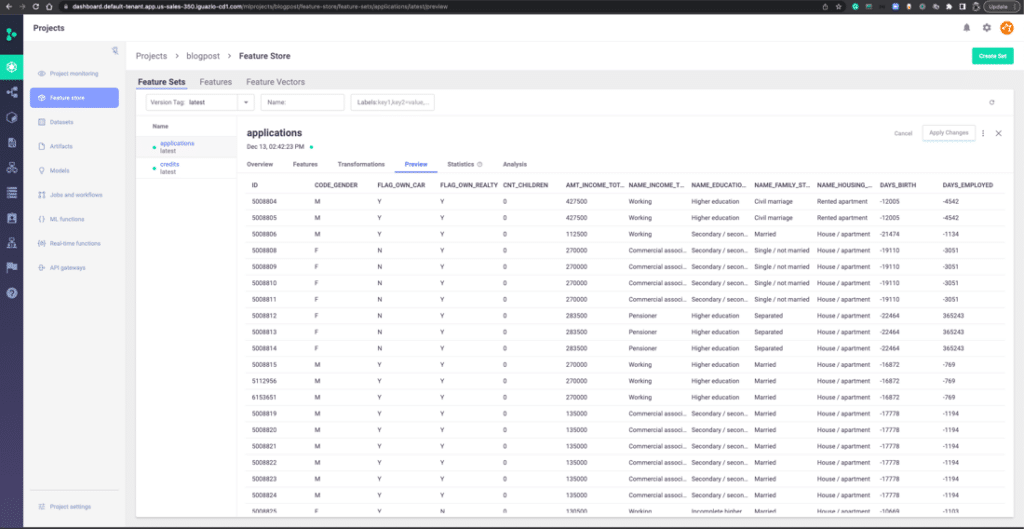
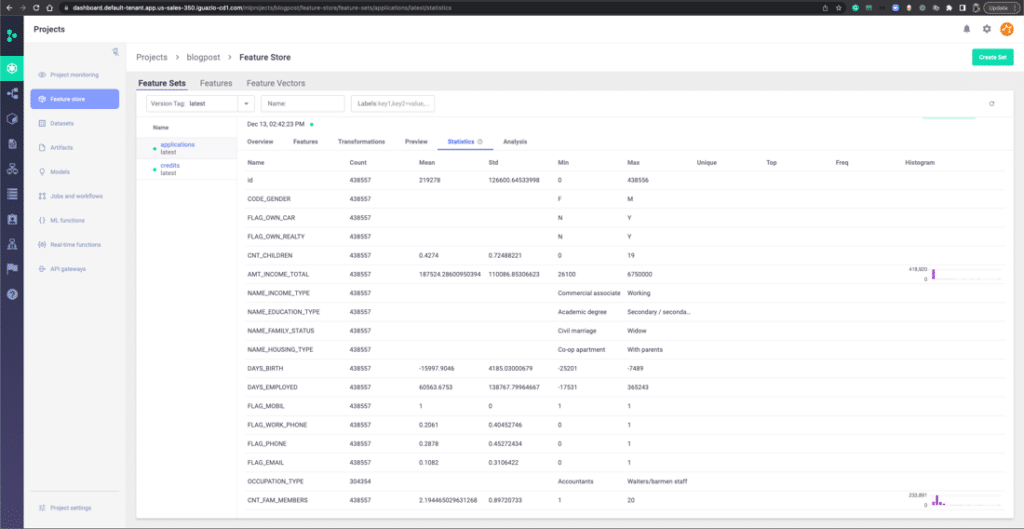
This allows for easy discovery and inspection of existing features in the Feature Store.
Retrieve Snowflake Data from the Feature Store
Now that our data has been ingested into the Iguazio feature store, it can be easily used for batch and real-time use cases.
First, we must construct a Feature Vector like so:
vector = fstore.FeatureVector(

name="credit-application-vec",

features=["applications.*", "credits.*"],

label_feature="credits.STATUS",

with_indexes=True

)

vector.save()
This will allow us to transparently join our feature sets together. Then, we can retrieve the entire dataset for batch use cases like so:
training_dataset = fstore.get_offline_features(

"credit-application-vec", target=ParquetTarget()

).to_dataframe()
This will mainly be used for training models and EDA. Once our model is deployed, we may need to retrieve features in real time for enrichment or lookup purposes. We can retrieve individual records from our feature vector like so:
feature_service = fstore.get_online_feature_service(

"credit-application-vec"

)

feature_service.get([{"ID":"5008904"},{"ID":"5008905"}])
This allows us to easily enrich incoming requests using data from Snowflake within milliseconds.
Bringing It All Together
Modern data stacks are complicated. There are so many available tools and methodologies that address various data challenges, making it difficult to discern when and how to use them. The Iguazio feature store decreases a lot of this complexity, by integrating seamlessly with popular tools such as Snowflake and Spark for distributed ingestion via a simple Python SDK.
For more information on Iguazio, feature stores, and more, check out the documentation or contact us here.


